Contrary to the popular belief that there’s a magic date to stop sterilizing, the key is to evolve your approach. As a microbiologist, I advise parents to shift from a goal of total sterility to one of calibrated hygiene. This involves systematically managing microbial risks based on your baby’s age, health, and environment. This guide explains how to build that intelligent system to support, not suppress, a robust immune system.
The question of when to stop sterilizing baby bottles is a rite of passage for new parents. You’ve spent months meticulously ensuring every nipple and bottle is a pristine, germ-free vessel for your baby’s nutrition. Yet, as your little one starts exploring the world with their mouth, the logic of maintaining a sterile bubble begins to feel contradictory. You see them chewing on a toy that fell on the floor, and the nightly sterilization ritual suddenly seems less critical. The common advice—stop at 6 months, or maybe 12—feels arbitrary and lacks scientific grounding.
This uncertainty stems from a misunderstanding of the goal. The objective is not to create a germ-free world for your child, which is both impossible and undesirable. Instead, the focus should be on providing “immune education.” This means managing exposure to harmful pathogens while allowing contact with a diverse range of everyday microbes that help train a healthy, resilient immune system. The real question isn’t “when do I stop?” but “how do I adapt my hygiene practices as my baby develops?”
The answer lies in building a holistic hygiene system. This system is not a rigid set of rules but a dynamic framework for risk assessment. It involves understanding the specific microbial risks associated with different activities and environments—from the water you use to wash bottles, to the way you store them, and even to the health of the caregiver. This article will guide you through the key components of this system, providing the scientific rationale to help you move from anxious sterilizing to confident, calibrated hygiene.
This guide breaks down the essential components of a calibrated infant hygiene system, giving you the tools to make informed decisions for your family’s health. The following sections will explore everything from feeding equipment to proactive health management.
Table of Contents: Your Guide to Calibrated Infant Hygiene
- Steam vs. UV Sterilizers: Which Kills More Bacteria in Less Time?
- Does the Dishwasher Sanitize Bottles Enough for a 3-Month-Old?
- Well Water vs. City Water: When Is Sterilization Non-Negotiable?
- The Storage Mistake That Re-Contaminates Bottles in 2 Hours
- How Often Should You Replace the Bottle Brush to Avoid Mold?
- Why Kegels Might Be Making Your Pelvic Floor Worse, Not Better?
- How to Choose Clothes That Don’t Irritate the Umbilical Cord Stump?
- How to Prepare for Pediatrician Visits to Get Real Answers?
Steam vs. UV Sterilizers: Which Kills More Bacteria in Less Time?
The first component of your feeding hygiene module is the sterilization method itself. Both steam and UV sterilizers are highly effective, but they operate on different principles with distinct trade-offs. Steam sterilizers use high-temperature water vapor to kill bacteria, a time-tested method that ensures all surfaces, nooks, and crannies are reached. UV sterilizers, on the other hand, use ultraviolet light, specifically UV-C light, to destroy microbial DNA. While modern devices are powerful, their effectiveness depends on direct light exposure; any “shadowed” area may not be fully sanitized.
From an efficacy standpoint, both methods achieve a 99.9% kill rate for common bacteria when used correctly. For instance, research on UV sterilizer effectiveness shows that light at a specific wavelength of 253.7 nanometers can eliminate up to 99.9% of bacteria. The primary differences lie in speed, convenience, and material impact. Steam is often faster, but UV sterilizers don’t require water and can double as a drying and storage unit. A crucial point for calibration is the long-term effect on your feeding equipment.
Case Study: The Hidden Cost of UV Sterilization on Plastics
While effective, UV light has a known degrading effect on certain plastics commonly used in baby bottles, such as polypropylene (PP). Over time, the UV rays can break down the plastic’s molecular bonds, leading to discoloration, brittleness, and micro-cracking. Some bottle manufacturers even advise against using UV sterilizers because this degradation can compromise the bottle’s structural integrity, creating a safety concern. This highlights a key principle of calibrated hygiene: the “best” method must balance germ-killing power with the safety and durability of the materials involved.
To help you weigh the options for your specific needs, this comparison outlines the key features of each method.
| Feature | Steam Sterilizer | UV Sterilizer |
|---|---|---|
| Sterilization Time | 5-10 minutes | 10-60 minutes |
| Effectiveness | 99.9% bacteria kill rate | 99.9% bacteria kill rate (direct exposure only) |
| Coverage | Steam penetrates all surfaces | Only surfaces with direct UV light exposure |
| Water Required | Yes | No |
| Material Impact | May cause mineral deposits | Can degrade plastics over time |
Ultimately, the choice depends on your priorities. If you value speed and guaranteed full coverage, steam may be preferable. If you prioritize a multi-function device for sterilizing, drying, and storing, UV is a compelling option, but you must be mindful of its potential impact on plastic bottles over the long term.
Does the Dishwasher Sanitize Bottles Enough for a 3-Month-Old?
For many parents, the dishwasher represents a significant step towards simplifying the hygiene routine. The key question is whether it truly sanitizes or just cleans. Most modern dishwashers offer a “sanitize” cycle, which uses a high-temperature rinse (typically above 150°F or 65°C) to kill 99.9% of bacteria. For a healthy baby over three months old, a dishwasher with a certified sanitize cycle is generally considered a safe and effective alternative to a dedicated sterilizer, provided you follow critical pre-cleaning steps.
However, this convenience comes with a major caveat: the dishwasher is not a magic box. It cannot remove caked-on milk residue or reach into the fine threads of a bottle collar. Effective sanitization relies on meticulous pre-cleaning. Milk fats and proteins create a protective layer, or biofilm, that shields bacteria from the hot water and detergent. Without first disassembling and scrubbing all parts with a bottle brush and hot, soapy water, the sanitize cycle may be ineffective. For very young or vulnerable infants, this risk is too high.
This is why according to CDC guidelines, daily sanitizing is still required for babies under two months of age, those who were born prematurely, or any child with a weakened immune system. For this group, a dedicated sterilizer is non-negotiable. After this critical period, a dishwasher’s sanitize cycle becomes a viable part of your calibrated hygiene system if used correctly. Proper loading is also essential for success, as the image below demonstrates.
As you can see, placing bottles and parts face down on the top rack ensures that water jets can reach all surfaces and that items drain properly. Following a strict pre-cleaning and loading protocol is what elevates the dishwasher from a simple cleaner to a reliable sanitizer.
In summary, the dishwasher can be an excellent tool for parents of healthy, older infants. But its effectiveness is entirely dependent on the diligence of your preparation. Never assume the machine can do all the work.
Well Water vs. City Water: When Is Sterilization Non-Negotiable?
A crucial, often overlooked, variable in your infant hygiene system is your water source. The water you use to wash bottles—and potentially to mix formula—can be a primary source of microbial or chemical contamination. Municipal or “city” water is treated and regularly tested to meet federal safety standards, making it generally safe for washing feeding equipment. However, private well water is unregulated, and its quality can fluctuate significantly based on environmental factors like rainfall, agricultural runoff, or septic system issues.
For families using well water, sterilization is not just a precaution for the first few months; it is a non-negotiable, ongoing practice. Wells can be contaminated with harmful bacteria like E. coli or high levels of nitrates, which are particularly dangerous for infants. Boiling water effectively kills biological contaminants but does not remove chemical ones. Therefore, relying on well water for any infant-related use requires a rigorous and consistent testing protocol. Your hygiene calibration must include regular water analysis.
Even families on city water should not be complacent. Aging infrastructure, main breaks, or natural disasters can lead to “boil water” advisories, during which the municipal supply is considered unsafe. In these situations, all water used for drinking, cooking, and washing baby items must be brought to a rolling boil for at least one minute. This underscores the principle that hygiene practices must adapt to changing environmental risks.
Your Action Plan: Well Water Safety and Testing
- Initial Assessment: Before your baby arrives, conduct a comprehensive water quality test to establish a baseline for your well.
- Bacterial Testing: Test your well water for coliform bacteria at least every three months to detect any new contamination.
- Annual Chemical Screen: Once a year, test for nitrates, arsenic, lead, and other common chemical contaminants in your region.
- Post-Event Testing: Immediately re-test your water after any flooding, well repairs, or noticeable change in water taste, color, or odor.
- Record Keeping: Maintain a log of all test results and share them with your pediatrician to inform their care recommendations.
Ultimately, your water source dictates the baseline level of vigilance required. While city water offers a degree of assumed safety, well water demands a proactive and evidence-based approach to risk management to protect your baby.
The Storage Mistake That Re-Contaminates Bottles in 2 Hours
You’ve meticulously washed and sterilized your baby’s bottles, eliminating 99.9% of harmful germs. But this sterile state is fragile. The single most common mistake that undoes all this hard work is improper storage. Leaving freshly sterilized bottles to air-dry on a contaminated countertop or pre-assembling them with wet hands can introduce new bacteria, which can multiply to dangerous levels in as little as two hours at room temperature.
The primary enemy here is a microbiological phenomenon known as biofilm. When even a few bacteria land on a damp surface, they can begin to form a slimy, protective matrix. This biofilm acts as a shield, making the bacteria within it more resistant to subsequent cleaning and even sterilization. It can develop quickly on seemingly clean surfaces, including the inside of a bottle or on a nipple.
Case Study: The 24-Hour Re-Contamination Cycle
Microbiological studies show that even in a clean environment, sterilized feeding equipment can become significantly re-contaminated if not stored correctly. If baby’s bottles have not been used after 24 hours of being sterilized and stored at room temperature, they should be considered contaminated and must be sterilized again before use. This is because ambient airborne bacteria can settle on the equipment and, in the presence of any residual moisture, begin to form a new biofilm, completely negating the initial sterilization process.
To prevent this rapid re-contamination, a strict storage protocol is essential. The goal is to move the equipment from the sterile environment of the sterilizer to a clean, dry, and protected state as quickly as possible. The ideal method is to leave bottles in the sterilizer with the lid on until you need them. Most sterilizers are designed to keep their contents sterile for up to 24 hours if unopened.
If you must remove them, follow these steps:
- Wash your hands thoroughly with soap and water before handling any sterilized equipment.
- Use sterile tongs, if provided, to remove items from the sterilizer.
- Immediately assemble the bottles, placing the nipple and cap on to protect the interior surface.
- Store the assembled, sterile bottles in a clean, covered container in the back of the refrigerator, not on the counter.
This protocol minimizes the window of opportunity for airborne bacteria to colonize your clean bottles, ensuring they remain safe until the next feeding.
Proper storage is not an optional extra; it is an integral and non-negotiable step in the chain of hygiene. A sterilized bottle is only as safe as its last point of contact.
How Often Should You Replace the Bottle Brush to Avoid Mold?
The humble bottle brush is your primary tool in the fight against milk residue and bacterial biofilm, yet it is also one of the most significant potential sources of contamination in your kitchen. Constantly damp and used to scrub away nutrient-rich milk, a bottle brush is the perfect breeding ground for bacteria, yeast, and mold. Using a dirty brush to “clean” a bottle can do more harm than good, cross-contaminating it with a concentrated dose of microbes.
Therefore, the hygiene of your cleaning tools is just as important as the hygiene of the bottles themselves. A clear protocol for cleaning and replacing your bottle brush is a cornerstone of a safe feeding system. The frequency of cleaning depends on your baby’s vulnerability. For instance, the CDC recommends that the wash basin and bottle brush be washed after every use for babies under two months or those with compromised immune systems. For most healthy infants, a thorough rinse and air-dry after each use, combined with a weekly sanitization, is sufficient.
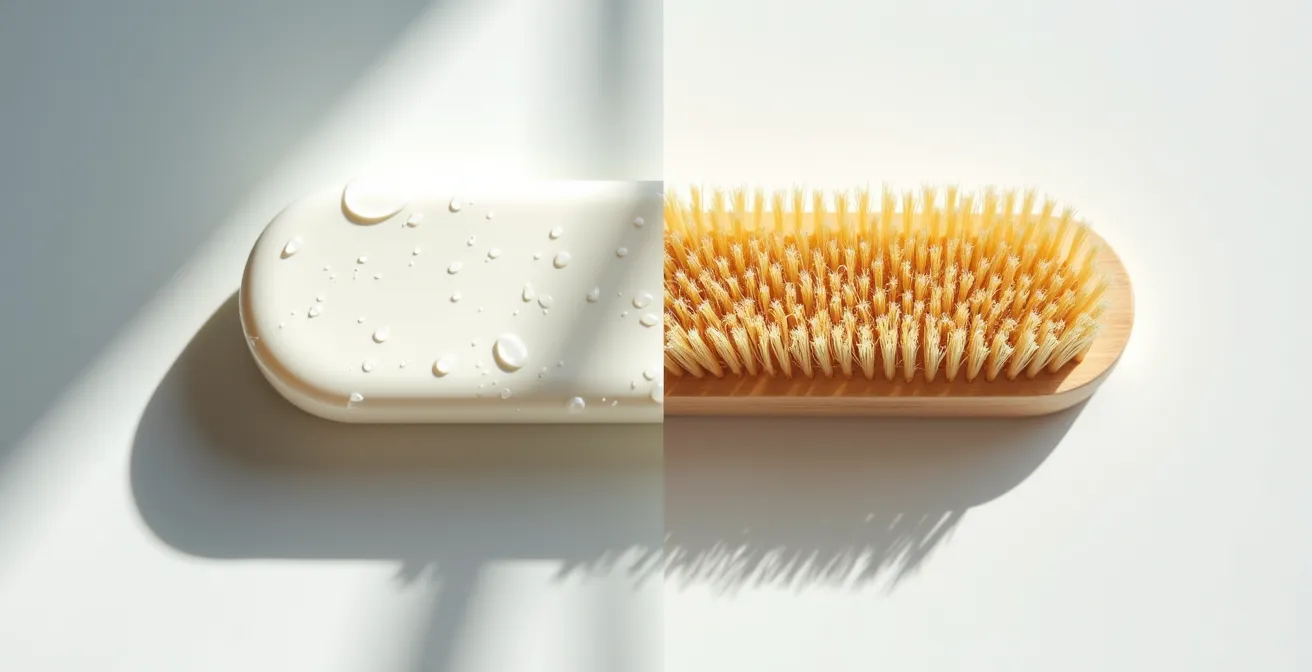
The choice of brush material also plays a role in your hygiene calibration. Traditional bristle brushes can trap particles and take longer to dry, while silicone brushes are non-porous, dry faster, and are generally more resistant to bacterial growth. The visual comparison below highlights the difference in material structure.
Regardless of material, no brush lasts forever. You must replace it at the first sign of wear and tear. Key indicators include:
- Worn or matted bristles: Damaged bristles are less effective at cleaning and can harbor more bacteria.
- Discoloration: Any staining, especially at the base of the bristles, can be a sign of mold or mildew growth.
- Persistent odors: If the brush retains a sour milk smell even after cleaning, it’s time to replace it.
As a general rule, plan to replace your bottle brush every 3-4 weeks for bristle brushes and every 4-6 weeks for silicone, or immediately if you see any of the warning signs above.
Treating your bottle brush with the same level of hygienic concern as the bottles themselves closes a major loophole in your infant care system.
Why Kegels Might Be Making Your Pelvic Floor Worse, Not Better?
While it may seem unrelated to bottle sterilization, a parent’s physical well-being is a foundational element of the baby’s hygienic environment. A caregiver who is in pain, stressed, or experiencing physical dysfunction will find it more challenging to consistently perform the demanding tasks of infant care. Postpartum pelvic floor health is a critical, and often misunderstood, aspect of this. For decades, Kegels have been prescribed as a cure-all for postpartum recovery, but for many women, they can actually worsen the problem.
The pelvic floor is a group of muscles that can be either too weak (hypotonic) or too tight (hypertonic). Kegels are a strengthening exercise, designed to tighten these muscles. If a woman’s pelvic floor is already hypertonic—often as a result of the trauma of childbirth or chronic stress—performing Kegels will only increase the tension. This can lead to a host of problems, including pelvic pain, painful intercourse, and urinary incontinence or urgency, because the muscles are too tight to function correctly.
Case Study: The Hypertonic Pelvic Floor Paradox
Many women postpartum experience symptoms like urinary leakage and assume the cause is weakness, so they begin diligently performing Kegels. However, a significant number of these cases are actually caused by hypertonicity. For these women, the strengthening exercises exacerbate the tightness, leading to increased pain and worsening incontinence. The solution is not strengthening, but relaxation. This requires specialized techniques like reverse Kegels and diaphragmatic breathing, often guided by a pelvic floor physiotherapist, to teach the muscles to release and regain their proper range of motion.
Before beginning any postpartum exercise regimen, it is crucial to get a proper assessment from a pelvic floor specialist. They can determine whether your muscles are hypotonic or hypertonic and create a personalized recovery plan. If you are experiencing any of the following symptoms, avoid traditional Kegels until you have been evaluated:
- Pain during or after intercourse
- Difficulty fully emptying your bladder or bowels
- Chronic pelvic, hip, or lower back pain
- A feeling of urinary urgency or frequency
Focusing on proper recovery, which may involve relaxation rather than strengthening, is an essential act of self-care that directly supports your ability to care for your baby.
A healthy, functional caregiver is the most important component of a safe and stable environment for a developing child. Prioritizing your own physical recovery is not selfish; it is a prerequisite for providing the best care.
How to Choose Clothes That Don’t Irritate the Umbilical Cord Stump?
Long before you worry about sterilizing bottles, the first critical point of hygiene management is the umbilical cord stump. This delicate tissue is a direct pathway into the baby’s bloodstream, making proper care essential to prevent infection. While the primary rule is to keep the area clean and dry, the choice of clothing plays a surprisingly significant role in facilitating healing and preventing irritation. The goal is to create an environment that promotes air circulation and minimizes physical friction.
The two main principles for dressing a newborn with an umbilical cord stump are moisture management and pressure avoidance. Cotton has long been the traditional choice for baby clothes, but for umbilical cord care, fabrics with better moisture-wicking properties, such as bamboo or modal, can be superior. They pull moisture away from the skin, helping the stump to dry out faster, which is crucial for it to detach naturally and without infection. A dry environment is inhospitable to the bacteria that can cause a dangerous infection known as omphalitis.
Case Study: The Impact of Fabric and Design on Healing
Clinical observations have shown that the design of newborn clothing can be even more important than the material itself in preventing stump irritation. Kimono-style or side-snap bodysuits are demonstrably better than traditional over-the-head onesies during the first two weeks. They eliminate the need to pull clothing over the sensitive stump area, reducing friction and the risk of accidentally snagging or pulling it. Paired with a diaper that is folded down to create an air gap, these design choices create the ideal micro-environment for rapid and uncomplicated healing.
When selecting your newborn’s first wardrobe, prioritize these features:
- Side-snap or kimono-style closures: These avoid any contact with the stump during dressing and undressing.
- Loose-fitting garments: Ensure there is no pressure or rubbing against the healing area.
- Breathable, moisture-wicking fabrics: Look for lightweight bamboo, modal, or very light cotton to promote air circulation.
- Built-in fold-over mittens: These prevent the baby from accidentally scratching the stump with their sharp little fingernails.
This careful approach to clothing selection is the first step in your calibrated hygiene system, protecting one of your newborn’s most vulnerable areas.
By choosing the right clothes, you are not just dressing your baby; you are actively participating in a critical wound-care process that sets the stage for a healthy start.
Key Takeaways
- Effective infant hygiene is about calibration, not just sterilization. You must adapt your methods based on age, health, and environment.
- The ultimate goal is “immune education” through safe, managed exposure to microbes, not the creation of a sterile, germ-free bubble.
- Every element is a variable in your hygiene system: your water source, storage methods, cleaning tools, and even your own well-being directly impact your baby’s health.
How to Prepare for Pediatrician Visits to Get Real Answers?
The final, and perhaps most powerful, component of your calibrated hygiene system is information management. You are the expert on your child’s day-to-day patterns, but your pediatrician is the expert on infant health. The partnership between you is crucial for making the best decisions, including when and how to adjust your hygiene protocols. However, pediatrician visits can be short and overwhelming. Arriving unprepared often leads to vague answers and missed opportunities. To get real, actionable advice, you must transform from a passive recipient of information into an active, prepared partner in your child’s care.
This means going into each appointment with structured, objective data, not just a feeling that “something is off.” Tracking key metrics in the days leading up to a visit provides your doctor with the concrete evidence they need to see patterns and make an accurate diagnosis. Vague complaints like “he’s been fussy” are less helpful than “he has been crying inconsolably from 7 PM to 8 PM every evening for the past three days.” This level of detail allows the pediatrician to rule out possibilities and focus on likely causes.
The table below provides a simple template for the kind of data you should be tracking before a visit, especially if you have a specific concern.
| Category | What to Track | Example Data Points |
|---|---|---|
| Feeding | Time, amount, behavior | 3pm: 4oz formula, fussy during feed |
| Diapers | Wet/dirty count, consistency | 6 wet, 2 dirty (loose consistency) |
| Sleep | Duration, wake patterns | 2hr morning nap, frequent night waking |
| Symptoms | Specific observations with time | Inconsolable crying 7-8pm daily x 3 days |
| Changes | New behaviors or patterns | Refusing afternoon bottle since Tuesday |
Once you are in the appointment, having a framework for asking questions ensures you leave with a clear understanding of the recommendations. The BRAIN acronym is an excellent tool for this. For any proposed test, medication, or intervention, ask:
- Benefits: What are the potential benefits of this action?
- Risks: What are the possible risks or side effects?
- Alternatives: Are there any other options we could consider?
- Intuition: Check in with your gut. Does this feel right for your child? (Followed by a clarifying question).
- Nothing: What would happen if we chose to wait and do nothing for now?
This structured approach empowers you to have a meaningful dialogue with your pediatrician, ensuring you receive the clear, specific answers you need to effectively manage your baby’s health and hygiene.
By arming yourself with data and a clear communication strategy, you become an indispensable partner in your child’s healthcare, capable of making confident, well-informed decisions.
Frequently Asked Questions About Infant Hygiene and Safety
What temperature kills bacteria in city water during a boil advisory?
During a boil advisory, you should bring cold tap water to a rolling boil for 1 minute (no longer). After boiling, let the water cool to room temperature for no more than 30 minutes before using it to prepare formula or wash items.
Can sterilization remove chemical contaminants from well water?
No, sterilization (including boiling, steaming, or UV) only kills biological contaminants like bacteria, viruses, and parasites. It does not remove chemical contaminants such as nitrates, lead, arsenic, or pesticides. Removing these requires specific water filtration or purification systems designed for chemical removal.
When should parents be extra cautious about water quality?
Parents should always be vigilant, but caution should be heightened in light of recent reports of contaminated city water supplies and general concerns over food safety. If you use a private well, have any reason to suspect your pipes may contain lead, or live in an area prone to natural disasters that can affect the water supply, extra diligence is warranted.