The true value of screen-free coding robots lies not in teaching a specific programming language, but in building a foundational cognitive architecture for problem-solving.
- They transform abstract logic into tangible, physical sequences, making concepts like cause-and-effect concrete for pre-readers.
- The process of “physical debugging”—analyzing why a robot failed and correcting the command sequence—is where the most profound learning occurs.
Recommendation: Prioritize robots that facilitate procedural thinking and offer expandable, open-ended play over simple “push-button” toys to ensure a lasting impact on your child’s analytical skills.
In a world saturated with screens, the promise of a “screen-free coding toy” is a powerful siren song for tech-forward parents. The pitch is compelling: prepare your child for a STEM-driven future without adding to their iPad time. We’re told these friendly-faced robots, with their colorful buttons and charming beeps, are the key to unlocking a preschooler’s inner programmer. But this narrative, while appealing, often misses the point. It focuses on the superficial outcome—”learning to code”—while ignoring the more profound, underlying process.
The common approach is to buy the toy, hand it to the child, and hope that educational osmosis occurs. We see them pushing buttons and celebrate it as a victory against passive screen consumption. However, the real question isn’t whether these toys can keep a child occupied without a screen. The critical question, from a curriculum development perspective, is what cognitive structures are actually being built? Is the child engaging in genuine problem-solving, or are they just discovering a new, more complex version of a “cause-and-effect” button toy?
The paradigm shift we must embrace is this: the investment is not in the robot itself, but in its potential to facilitate a specific mode of thinking. This article moves beyond the marketing hype to deconstruct how these devices work on a cognitive level. We will explore the tangible friction of trial, error, and physical debugging as the true engine of learning. Instead of asking “Does this teach coding?”, we will ask “How does this architect a child’s brain for logical reasoning?”
This analysis will guide you through the core mechanics of these educational tools, from how they teach logic before literacy to what truly separates a valuable learning system from a short-lived gadget. We will examine different interfaces, the risk of limited replay value, and what it really means to “debug” a physical toy, providing a framework to critically assess whether a screen-free robot is the right investment for your child’s future mind.
Summary: Evaluating the True Potential of Tangible Coding
- How Sequencing Movements Teaches Logic Before Reading?
- Directional Buttons or Color Scanners: Which Interface Is More Intuitive?
- Drawing Robots: How to Combine Creativity With Engineering?
- The “One-Trick Pony” Risk: Which Robots Offer Replay Value?
- What to Do When the Robot Doesn’t Follow the Line?
- How to Draw Picture Clues for Non-Readers That Are challenging but Solvable?
- Why “Push Button” Toys Are Not True STEM Learning Tools?
- Do STEM Toys Actually Teach Coding to Preschoolers?
How Sequencing Movements Teaches Logic Before Reading?
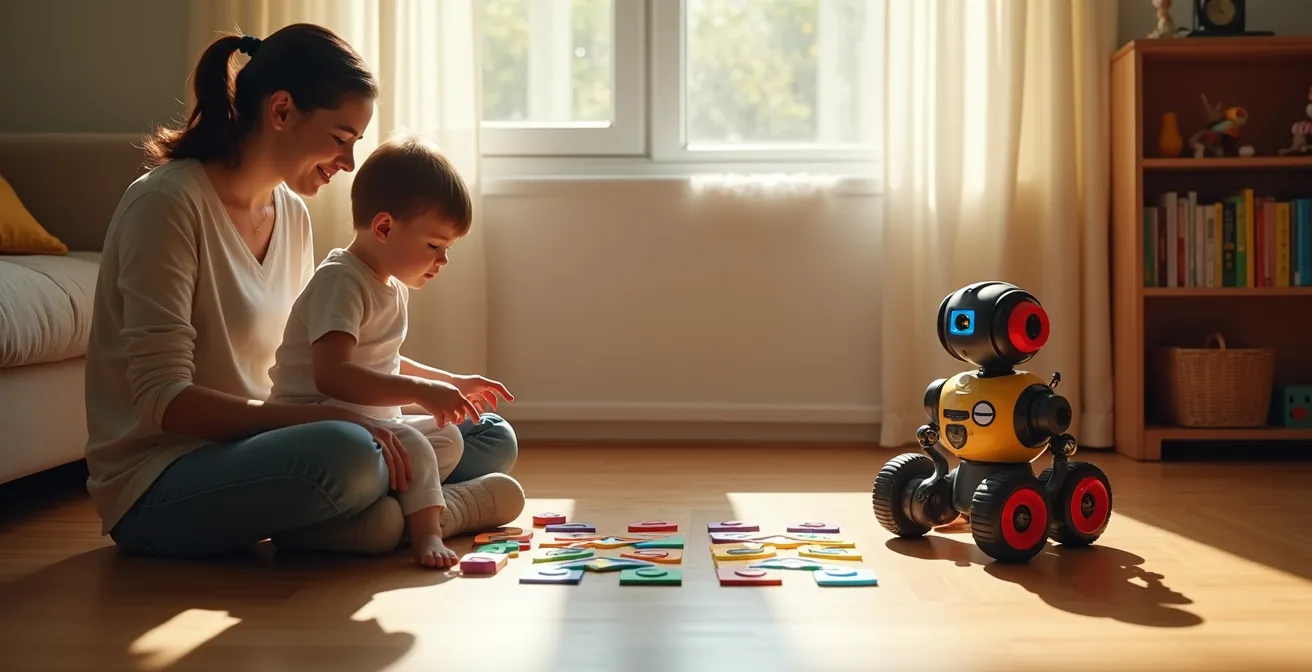
The primary function of a screen-free coding robot for a pre-reader is not to teach a language like Python, but to externalize the fundamental structure of logic: sequencing. Before a child can comprehend abstract symbols on a screen, they can understand “first this, then that, then turn.” This is procedural thinking in its most elemental form. By pressing a series of buttons—Forward, Forward, Turn Right, Forward—the child is not just playing; they are composing a simple algorithm and then observing its physical execution.
This tangible feedback loop is critical. The robot’s movement in physical space provides immediate, undeniable proof of the sequence’s outcome. If the robot bumps into a chair, the “bug” in the code is not an error message on a screen, but a concrete event in the real world. This process bypasses the need for literacy and symbolic understanding, connecting the abstract concept of order directly to a physical result. It’s the difference between reading a recipe and actually mixing the ingredients to see if a cake rises.
Research confirms the power of this tangible approach. A study from Tufts University’s DevTech Research Group found that young children using tangible coding robots demonstrated a 27% better performance on sequencing tasks compared to their peers. This improvement isn’t just about memory; it’s about building the cognitive architecture for computational thinking. The child learns that a plan must be formulated completely *before* execution, and that the order of operations is non-negotiable for achieving a desired result. This foundational understanding of logic and planning is a far more valuable and transferable skill than memorizing any specific coding command.
Directional Buttons or Color Scanners: Which Interface Is More Intuitive?
The interface of a coding robot is the bridge between a child’s intention and the machine’s action. The two dominant screen-free paradigms are direct command interfaces, like directional buttons, and symbolic interfaces, such as color tile scanners. The choice between them is not merely aesthetic; it dictates the cognitive load and the type of logical leap a child is required to make. For the youngest users (ages 3-4), direct command is king. An arrow pointing forward intuitively means “go forward.” The cause and effect are immediate and require minimal abstraction.
An implementation of this principle is seen with Learning Resources’ Botley 2.0. In classroom tests, children engaged with its infrared remote almost instantly, pressing directional buttons to see the robot light up and move. This low barrier to entry, with no app or setup, facilitates immediate, kinesthetic learning. The child learns through direct manipulation, which is a powerful educational mode for this age group.
Case Study: Botley 2.0’s Immediate Engagement
Learning Resources’ Botley 2.0, tested with 6-year-olds, demonstrated immediate engagement through its infrared remote interface. Children were pressing buttons within minutes, delighted by lights, sounds, and voice effects. The screen-free approach with directional buttons allowed instant play with no app setup, making it particularly effective for classrooms and low-tech homes. The robot supports up to 150 command sequences, providing genuine coding depth while maintaining accessibility.
As children mature (ages 5-6), they become more capable of handling symbolic systems. Color scanners, where different colored tiles represent different commands (e.g., blue for “turn right,” red for “go forward”), introduce a layer of abstraction. The child must first learn and remember this new “language.” This is a step closer to actual programming, which is fundamentally based on symbolic representation. While the cognitive load is higher, it trains a different, more advanced skill: mapping a symbol to an action.
The following table breaks down these differences, helping parents match the interface to their child’s developmental stage.
| Interface Type | Best Age Range | Cognitive Load | Learning Style Match |
|---|---|---|---|
| Directional Buttons | 3-4 years | Lower – Direct command | Kinesthetic learners |
| Color Tiles/Scanners | 5-6 years | Higher – Symbolic language | Visual learners |

Ultimately, neither interface is universally “better.” The most intuitive choice is the one that aligns with the child’s current cognitive abilities while offering a gentle push toward the next level of abstraction. An ideal learning pathway might even involve starting with directional buttons and graduating to a more symbolic system over time.
Drawing Robots: How to Combine Creativity With Engineering?
Drawing robots represent a brilliant fusion of left-brain and right-brain activity, translating abstract code into tangible, visual art. This approach masterfully answers the question, “What is the point of all this sequencing?” For many children, the goal of moving a robot from point A to point B can become repetitive. But when the robot holds a marker and its path creates a geometric shape, the programming task is imbued with a new, creative purpose. The child is no longer just a programmer; they are an artist and an engineer.
Toys like the Educational Insights’ Artie 3000 exemplify this concept. By programming a sequence of movements, the child isn’t just solving a maze—they’re instructing the robot on how to draw a square, a star, or a complex spirograph pattern. This makes abstract concepts like angles, loops, and coordinates immediately visible. The code is no longer an invisible set of instructions; it is the blueprint for a work of art. This provides a powerful, intrinsic motivation to experiment and debug.
Case Study: Artie 3000 and Visualizing Code
Educational Insights’ Artie 3000 combines art and coding by allowing children to program drawing sequences. Using a drag-and-drop interface with languages like Blockly and Snap!, kids command Artie to create geometric patterns. The robot accepts standard markers and transforms coding commands into visual art, making abstract programming concepts tangible through creative output.
The true pedagogical power of these robots emerges when children start asking “what if?” questions. This is where creative exploration meets the scientific method. As one STEM education guide suggests, the learning is in the experimentation. The parent or educator’s role is to prompt this inquiry:
What happens to the shape if we change the turn from 90 degrees to 45 degrees?
– STEM Education Guide, Article on mathematical concepts in drawing robots
This simple question transforms the activity from following instructions to genuine inquiry. The child makes a hypothesis (it will make a sharper point), changes a variable in their code (the angle of the turn), and observes the result. They are learning about geometry and programming simultaneously, all through a process of creative iteration. This is far more powerful than simply coloring in a book or completing a worksheet.
The “One-Trick Pony” Risk: Which Robots Offer Replay Value?
One of the most significant risks when investing in a high-tech toy is its potential to become a “one-trick pony”—a device that is exciting for a week and then gathers dust. With coding robots, this risk is particularly high if the toy’s activities are limited to a closed set of puzzles. Once the child has solved all the pre-programmed challenges, the toy loses its purpose. The key to long-term engagement and, therefore, long-term learning, is replay value, which stems from open-endedness and expandability.
A robot with high replay value is not just a puzzle-solver; it’s a platform. It’s a tool that can be integrated into the broader ecosystem of a child’s play. Can it navigate a city built of LEGOs? Can it be programmed to deliver a “secret message” to a sibling in another room? Can it participate in an imaginative story involving other dolls and action figures? If the answer is yes, the robot has transcended its function as a “coding toy” and become a dynamic character in the child’s world.
To assess a robot’s potential for replay value, parents should think like curriculum developers and evaluate its potential for growth. Does the robot offer more advanced challenges as the child’s skills develop? Are there community-created challenges or expansion packs available? A toy that grows with the child is one that will continue to deliver educational returns long after the initial novelty has worn off. This audit checklist can help parents gauge the long-term potential of a coding robot before purchasing.
Your Replay Value Scorecard: Assessing a Robot’s Long-Term Potential
- Open-Endedness: Can the robot be used without a pre-defined goal, or does it only follow a set of included puzzles? Score higher for free-play potential.
- Expandability: Does the manufacturer offer add-ons, software updates, or online community challenges that grow with the child’s skills?
- Integration: How well does the robot interact with existing toys like blocks, LEGOs, or art supplies? Can it be incorporated into imaginative play?
- Challenge Scalability: Does the toy offer different levels of difficulty, moving from simple sequences to more complex logic like loops or “if/then” statements?
- Creative Output: Can the robot do more than just move? Does it draw, make music, or carry objects, allowing for more diverse and creative applications?
By prioritizing these factors, you shift the focus from “What does this toy do?” to “What can my child *do with* this toy?” That shift is the difference between a fleeting distraction and a lasting investment in cognitive development.
What to Do When the Robot Doesn’t Follow the Line?
It’s a moment of peak frustration for both child and parent: you’ve carefully programmed the robot, you’ve drawn the perfect black line, and the robot veers off course. The temptation is to declare the toy “broken.” However, from a STEM perspective, this moment of failure is the most valuable learning opportunity the toy can offer. This is physical debugging, and it is the heart of the engineering mindset.
Instead of seeing a failure, we must reframe the event as unexpected data. The robot’s “error” is not a defect; it’s a clue. This is the moment to transition from player to scientist. As the experts at Magic Kids Learning suggest, the approach should be one of inquiry, not frustration:
Treat the error not as a broken toy, but as the start of a scientific experiment: What did we expect? What happened instead?
– Magic Kids Learning, Guide to Teaching Kids Coding Concepts
This reframing guides the child through a systematic process of troubleshooting. Is the problem with the code (the instructions)? Is it with the hardware (the robot’s sensors)? Or is it with the environment (the line, the lighting)? By isolating variables, the child is practicing a core skill of any programmer or scientist. For example, if a line-following robot fails, the debugging process might involve checking the thickness and contrast of the line, the ambient light in the room which could interfere with optical sensors, or meticulously re-examining the code to find the exact point of failure.
This process teaches resilience, critical thinking, and the iterative nature of problem-solving. Success is not defined by getting it right the first time, but by the ability to analyze a problem, formulate a hypothesis, test a solution, and learn from the outcome. The moment the robot fails is the moment the real education begins.
How to Draw Picture Clues for Non-Readers That Are challenging but Solvable?
Creating programming challenges for children who can’t yet read requires a visual language. The goal is to provide a “map” that is clear enough to be solvable but abstract enough to require genuine problem-solving. This is an exercise in instructional design. A challenge that is too literal becomes a simple following-the-line task with no cognitive effort, while one that is too abstract leads to frustration and disengagement. The key is scaffolding difficulty.
A well-designed progression might start with a very literal map. For a young child, this could be drawing the exact path the robot needs to take, with a clear “start” and “finish.” This teaches the 1:1 correlation between their programming and the robot’s movement. As they master this, you can introduce a layer of abstraction. For instance, using a consistent set of icons—a sequence of arrows and turn symbols laid out in a row—requires the child to translate the iconic sequence into a program.
The final and most challenging level is the goal-oriented map. Here, you provide only the start point, the end goal (e.g., a picture of a toy the robot needs to “rescue”), and any obstacles in between (a “river” made of blue paper, a “mountain” of pillows). The child must now devise the entire path themselves. This is no longer translation; it is true pathfinding and strategic planning. The KIBO robot’s methodology leverages this by embedding challenges in stories, turning a logic puzzle into an engaging quest. This narrative approach has been shown to be highly effective.
Case Study: Story Mapping with KIBO
The KIBO robot’s visual programming approach uses wooden blocks with icons that children physically arrange to create code. Instead of abstract symbols, educators embed programming challenges in visual narratives—a house (start), a playground (goal), and a ‘grumpy troll’s bridge’ (obstacle/book on floor). This story-based approach transforms logical puzzles into engaging quests, with children successfully completing 27% more computational thinking tasks compared to screen-based alternatives.
By consciously designing these visual clues and progressing through levels of abstraction, parents and educators act as curriculum designers, ensuring the challenges remain within the child’s “zone of proximal development”—difficult enough to be stimulating, but not so hard as to be discouraging.
Why “Push Button” Toys Are Not True STEM Learning Tools?
In the vast market of “educational” toys, a critical distinction must be made between reactive toys and procedural toys. A reactive, “push-button” toy operates on a simple, instant cause-and-effect loop: press the button, and a light flashes or a sound plays. While this teaches basic causality, it is a cognitive dead end. There is no planning, no sequencing, and no debugging. It is a one-step process that requires minimal cognitive engagement.
A true STEM learning tool, like a coding robot, is procedural. It introduces a crucial delay and a multi-step process: the child must first plan a sequence of actions, input that entire sequence into the device, and *then* execute the program to see the result. This “plan-then-execute” model is fundamentally different and vastly more powerful. It separates the planning phase from the action phase, forcing the child to think ahead, visualize a sequence of events, and hold a multi-step plan in their working memory.
This distinction is not trivial; it is the dividing line between passive entertainment and active cognitive training. A study of 101 kindergarteners found that robot programming which required this planning-before-execution model developed significantly stronger sequencing abilities. The study, involving children with an average age of around 64.78 months, highlighted that the mental effort of constructing a plan is where the real learning lies. A simple push-button toy, by providing instant gratification, robs the child of this critical cognitive workout.
We can think of these toys along a spectrum of cognitive demand. A push-button toy is at the lowest end, while a truly programmable robot that allows for modifying rules and creating new behaviors sits at the highest. Screen-free coding robots occupy the vital middle ground, serving as the perfect bridge from simple reactivity to complex systemic thinking.
| Toy Category | Cognitive Demand | Age Range | Example Features |
|---|---|---|---|
| Reactive (Push Button) | Low – Instant cause-effect | 1-2 years | Immediate response to action |
| Procedural (Sequencing Robots) | Medium – Plan then execute | 3-6 years | Program sequences, debug errors |
| Systemic (Programmable) | High – Modify rules | 7+ years | Create new behaviors, complex logic |
Key Takeaways
- The primary goal is teaching “Computational Thinking”—the process of breaking down problems—not a specific programming language.
- True learning happens during “physical debugging,” when a child analyzes why a robot failed and adjusts their plan.
- The best coding robots offer open-ended, expandable play that integrates with a child’s existing world, ensuring long-term replay value.
Do STEM Toys Actually Teach Coding to Preschoolers?
So, we arrive at the ultimate question: do these screen-free robots actually teach coding to preschoolers? The answer is a crucial and nuanced “no,” but for the right reasons. They do not teach “programming” in the vocational sense of writing syntax in a specific language. A six-year-old will not finish playing with a coding robot and be ready to build a website. To claim so would be a gross overstatement. However, they teach something far more fundamental and arguably more valuable: computational thinking.
As one pivotal study on early childhood robotics education clarifies, the objective is not language acquisition but process mastery. Computational thinking is the thought process used to formulate a problem and express its solution in a way that a computer—or a robot—can carry out. It involves decomposition (breaking a large problem into smaller parts), pattern recognition, abstraction (focusing on the important details while ignoring irrelevant ones), and algorithm design (creating a step-by-step solution). These are the foundational skills of every programmer, engineer, and scientist.
These toys teach ‘Computational Thinking’ (the process of breaking down problems) not ‘Programming’ (the syntax of a specific language).
– Research Team, Study on Early Childhood Robotics Education
The evidence overwhelmingly supports the effectiveness of these tools in building these core skills. One comprehensive 10-week study involving 124 Turkish preschoolers with an average age of 65.5 months found that using a robotic kit led to significant enhancements in both coding and computational thinking abilities. The “coding” part was the ability to sequence commands; the “computational thinking” part was the improvement in the underlying problem-solving strategies.
Therefore, the investment in a screen-free coding robot is not a shortcut to a career at Google. It is an investment in a child’s cognitive architecture. It’s about using a tangible, engaging, and developmentally appropriate tool to build the mental frameworks for logic, resilience, and systematic problem-solving that will serve them in any field they choose to pursue. The robot is not the teacher; it is the gym where the mind practices the exercises of logical thought.
Now that you are equipped with this critical framework, the next step is to evaluate potential options not just on their features, but on their ability to foster this deeper, procedural mode of thinking in your child.
Frequently Asked Questions on Screen-Free Coding Robots
Is the light in the room affecting the sensor?
Check if bright sunlight or dim lighting might be interfering with the robot’s optical sensors. Try adjusting room lighting or moving to a different area.
Is the line thick and dark enough?
Most line-following robots need lines that are at least 0.5 inches wide and have high contrast with the surface. Use a thick black marker on white paper.
Where exactly does the robot first go wrong?
Watch the robot in slow motion or step-by-step mode if available. Identify the exact point where it loses track – this often reveals whether it’s a sensor, programming, or environmental issue.